
Getting Started
This project is one of the quickest and barebones way of configuring and deploying your blog site. After the initial setup and deployment, everything else is automated all you have to do is just write your blogs into a markdown file and add metadata. Categorizing, sorting by date, rendering and styling is all handled for you.
Just follow the steps to configure and deploy your blog site.
- To get started just fork this repository and clone to your machine.
- Open the project in your favorite IDE or text editor.
- Open your terminal and run
pnpm installand thenpnpm run devthen open the link in your browser to see the default setup with the sample blog profile with example blogs.
Now, let's start customizing and personalizing your blog site.
- Start by navigating to the
src\libdirectory and open theconfig.jsonfile in your IDE. - Edit the
config.jsonfile with your personal info.
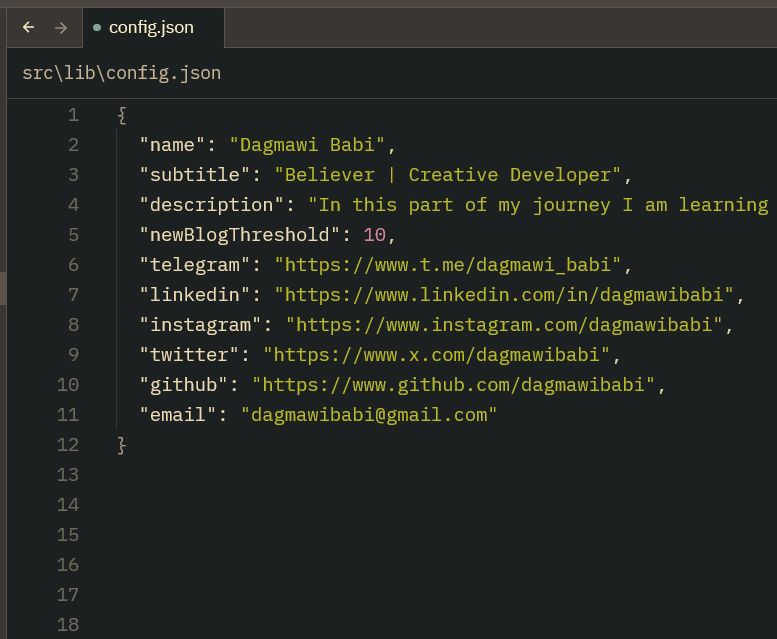
- Most of the configurations are self explanatory but the less obvious one is the
newBlogThresholdkey which represents the maximum number of days to consider a blog post as new. It can be set to any positive integer. So the default10means any blog post written within the last 10 days is considered as new and theNEWtag and the emerald highlight will be applied to the new blog posts.
- To replace the default logo at the header, navigate to the
src\lib\assets\logodirectory and replace theDagmawiBabiLogo.pngfile with your own light-mode logo image andDagmawiBabiLogoWhite.pngfile with your own dark-mode logo image.
With configurations out of the way let's get started writing your first blog post.
The file hierarchy for your blogs is as follows:
BareBlogs
├── static
│   └── blogs
│       └── My-First-Blog.md
│       └── My-Second-Blog.md
│       └── My-Third-Blog.md
│   └── blog-images
│       └── MyFirstBlog
│           └── header.png
│           └── anotherImage.jpg
│           └── yetAnotherMedia.gif
- The
blogsfolder is where all your writings as markdown will goto. Whileblog-imagesis where you place and organize your images and GIFs referenced in your blogs at.
-
Start by creating a new markdown file in the
src\blogsdirectory. Name it something likeMy-First-Blog.md. Remember to use-instead of spaces when naming your files as it will make the URLs more readable. -
Open the
My-First-Blog.mdfile in your IDE and add the following metadata at the top of the file:
---
title: My First Blog Post
date: 2025-11-01
category: "Journal"
---
-
Write your blog post content below the metadata. You can use Markdown syntax to format your text, add images, links, tables, code blocks, headings, blockquotes, lists and more.
-
Copy an image to
blog-images/MyFirstBlogasheader.pngand then reference it in your blog post using the following syntax:

-
Save the file and refresh your browser to see your new blog post listed in the feed, click on it to read it.
-
That's it! You can continue and use Vercel to deploy your blog site. Have fun!
Syntaxes
- Images

- Links
[Link Text](https://example.com)
- Code Blocks
```javascript
console.log('Hello World!');
- Headings
# Heading 1
## Heading 2
### Heading 3
- Blockquotes
> This is a blockquote.
- Lists
- Unordered List Item 1
- Unordered List Item 2
1. Ordered List Item 1
2. Ordered List Item 2